Security researchers are having a hard time keeping us secure. There are many ways to become a victim of cyber frauds running rampant on the internet. While you might have antivirus and know how to remove malware from a PC, these are software-based security solutions. This is basic security that a skilled cybercriminal can bypass. What’s tough to skip over is mechanisms backed inside the hardware. In that sense, having an active Trusted Platform Module (TPM) is vital.
What is TPM?
TPM is a motherboard-based chip that acts as a security guard for your PC. Besides, it can also come integrated with modern CPUs but runs on a standalone environment providing chip-level security. One of the most common ways to see this in action is if you’re using something like Bitlocker Device Encryption. If activated, the encryption keys are stored within the TPM preventing unauthorized access. However, this isn’t limited to this; there are many applications Windows can use TPM for. Ergo, having this active on the device is critical for overall security.
TPM Device not detected
Mostly associated with Dell PCs, this is a boot time error that you can easily ignore to continue using the system with some restrictions and risks. However, there are easy remedies to get this working again.
Enable TPM in BIOS
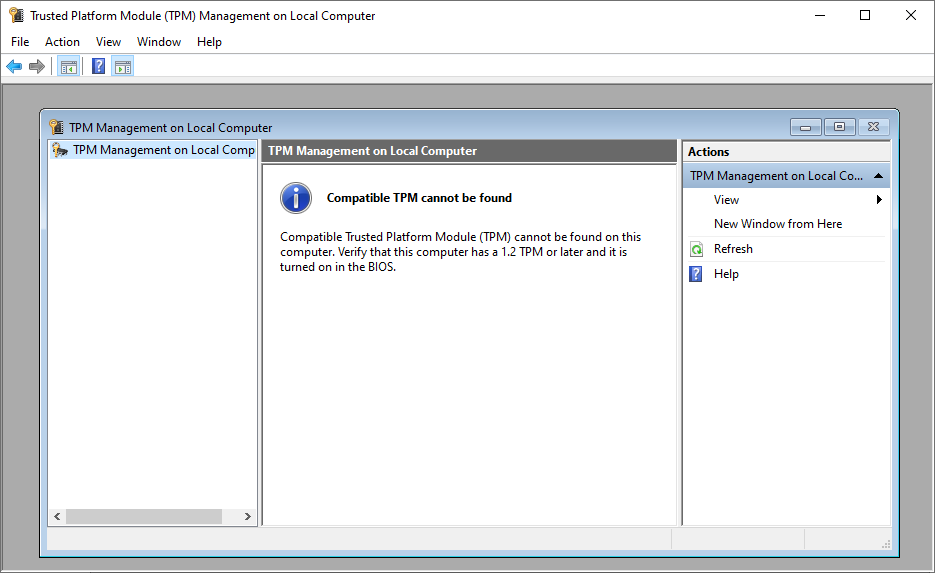
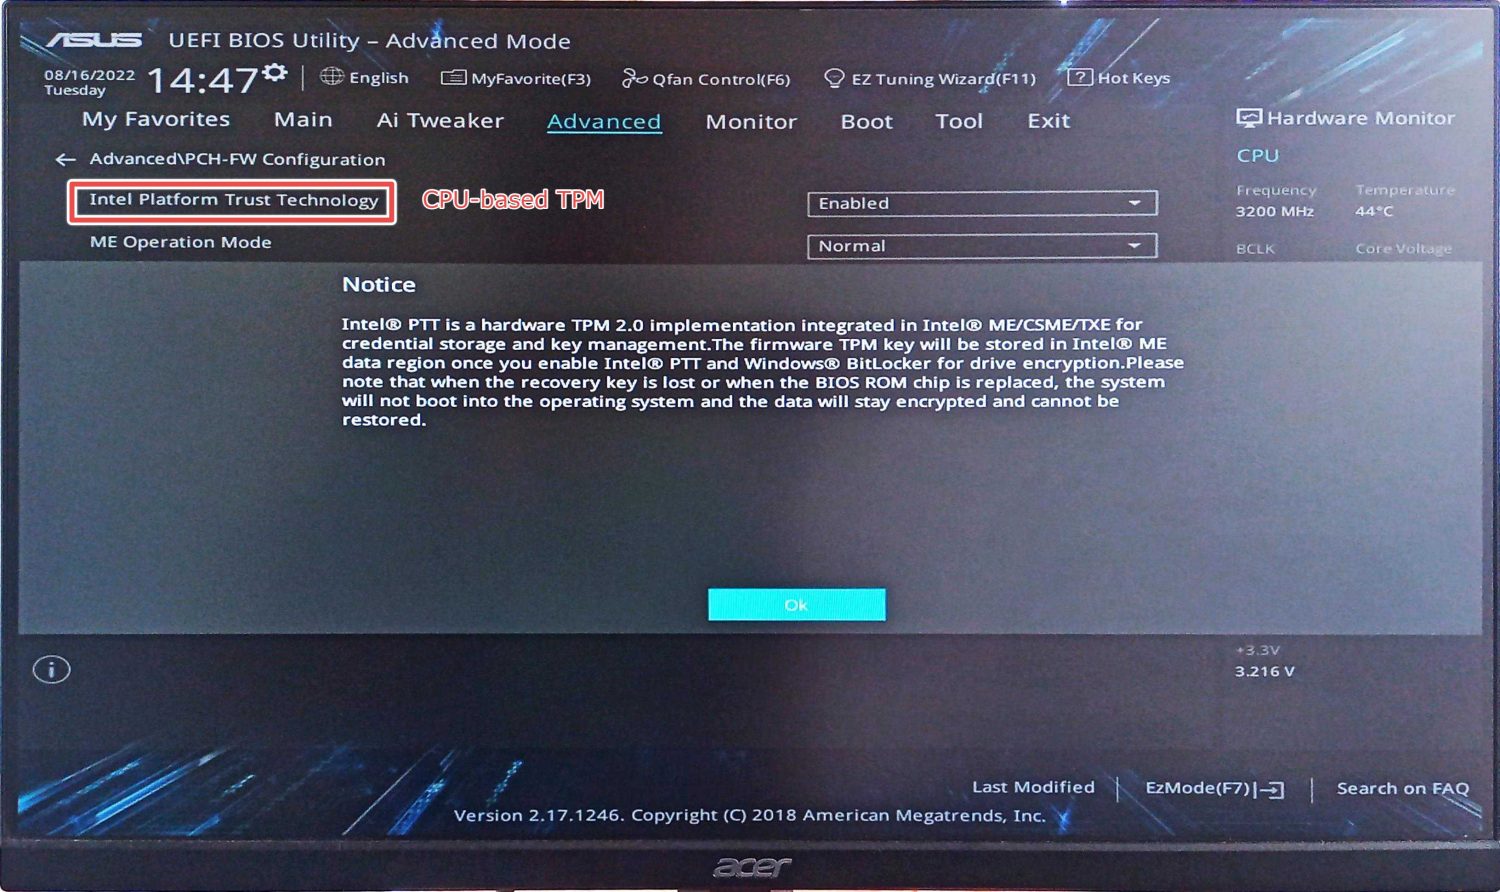
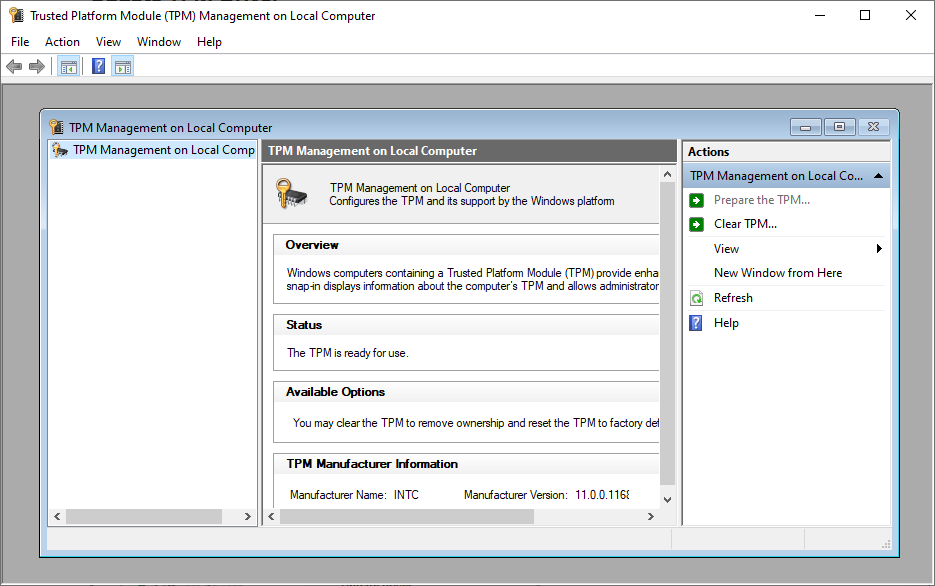
This is the first thing to check if the TPM chip is there and enabled from the BIOS. Press ⊞+R to open Windows Run and type tpm.msc. This will be the output if the TPM is disabled or not present with the hardware: If you’ve got a really old processor, maybe it didn’t come with the inbuilt TPM module. Now, you can either upgrade the CPU or purchase a TPM chip and install it on your motherboard. Another possibility is it’s turned off within the BIOS. In that case, reboot your PC, and enter the BIOS utility by pressing specific keys shown on the boot screen. Now, search for TPM configuration, or check the product guide if you can’t find it somehow. Afterward, enable it and reboot to check the status. Ideally, you won’t see any warning during boot this time, and running the tpm.msc would return a working TPM: However, there may be more to this TPM device detection issue. So, let’s check some other recommended solutions.
Update TPM Driver
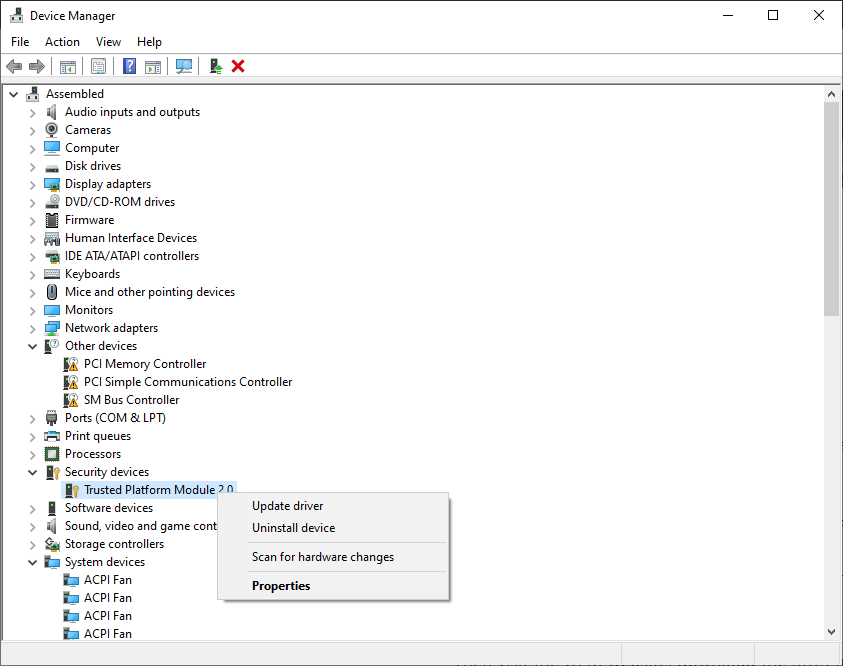
This is the simplest of the lot. Type Device Manager in the search bar and open it. Next, locate the Security devices, and click the Update driver under the Trusted Platform Module. Now reboot and check if the problem persists. Try the next solution if you still see the TPM device not detected.
Unplug The Battery
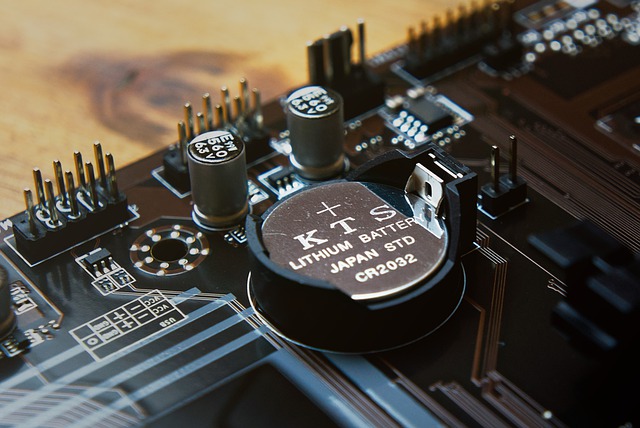
This is the most common fix which has worked for many. You can power down the machine and safely take out the battery. In the case of desktops, you can open the CPU cabinet and take out the CMOS for a BIOS reset. Subsequently, wait for a few minutes and plug everything back in to see if you’re out of the TPM device not detected. Still stuck? You can try to…
BIOS Update
A pending BIOS update can also be the culprit. However, updating BIOS without some technical know-how is risky. A wrong update or a power failure during a BIOS flash can prevent your motherboard from booting at all, asking at least for a BIOS chip replacement. Still, updating BIOS is easy for laptops and pre-built desktops. But first, disable the Bitlocker device encryption. Then visit the OEM website, download the BIOS for your PC, and run the file to follow the on-screen instructions. But updating BIOS isn’t this straightforward for custom PCs. To start, you need to check the motherboard version, download the BIOS from the manufacturer’s website, and save it on a USB. Afterward, restart the PC, and enter the BIOS utility. Subsequently, search for BIOS update options inside, and follow instructions unique to your motherboard model.
Wrapping Up
TPM device not detected is one of the primary problems many users face trying to upgrade to Windows 11. Still, an active TPM is good to have for many reasons. The solutions mentioned include enabling TPM from BIOS, updating the TPM driver, unplugging the battery, and lastly, the BIOS update. But if it’s still staring at you on every boot, try contacting support. PS: Check out how to change BIOS from legacy to UEFI, again important for those wishing to upgrade to Windows 11.
